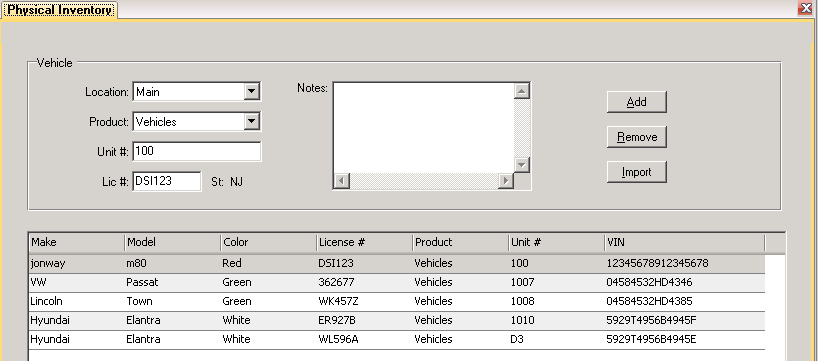
Physical Inventory
Location
FLEET
Purpose
This menu item is used to enter the vehicles that are parked on your lot (using the unit number or license plate). Once the vehicles have been entered, run the Physical Inventory Report to view any discrepancies. This will compare what you entered to what is in RentWorks with respect to each vehicle's status and location.
Process
1. Click on NEW in the upper left to create a new Physical Inventory list.
2. Enter the Unit number or license plate, then click on Add in the upper right.
3. Continue entering all the vehicles on your lot.
4. If one is entered in error, highlight it and click on Remove in the upper right.
5. When finished, click on the ![]() icon to run the Physical Inventory Report.
icon to run the Physical Inventory Report.
6. To create another list, first click on DELETE in the upper left. This will allow you to start over.
Fields
Location – The current location of the vehicle.
Product/Unit # – Use these fields to select a vehicle. You can also use the binocular lookup button to find a vehicle.
License Number - The vehicle’s current license plate number.
Lic St. – The licensing state or province of the vehicle.
Buttons
In addition to the normal Navigation buttons, there are three buttons on the far right:
-Click on Add to add a vehicle to the list in the bottom window.
-To remove a vehicle, highlight it in the list, then click on Remove.
-Click on Import to import vehicle information from a comma separated value (csv) file on your computer.
To generate the Physical Inventory List or Exception Report, click on the ![]() icon.
icon.
