Cash Receipts
Location
ADMIN > Companies
Purpose
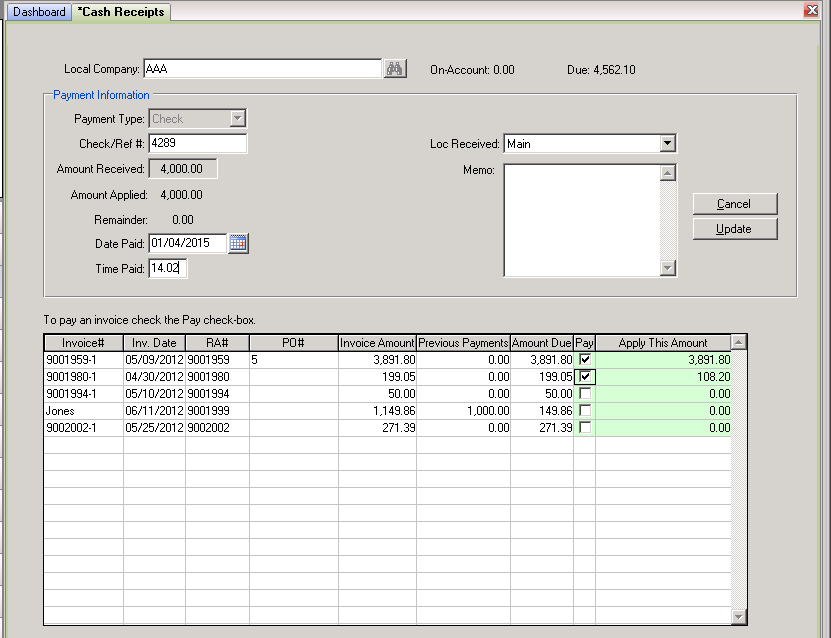
Use this menu item to apply payments received for direct-bills for closed or posted contracts. Select the local company from the drop-down list to which the cash receipt should be applied. All unpaid invoices for the selected company will be listed in the cash receipts browser.
Note: If you have the QuickBooks, Peachtree, or Great Plains Accounting Interfaces, journal entries will be created from Cash Receipts when you post the Daily Business Report.
Fields
Local Company - Use the binoculars button to search a list of companies currently setup on your system. After selecting a company, the total On-Account and Amount Due will display and all of the company’s rental agreements having an outstanding balance will appear in the cash receipts browser at the bottom of the screen.
Enter Receipt - Click on this button to enter a Cash Receipt. This will activate the fields in the Payment Information section, and the Cancel and Update buttons will also appear.
Payment Type - Use the drop-down menu to select the payment type. If you select CHECK, you will be prompted for the Check or Reference number. If you select any credit card type, you will be prompted for all of the credit card data (number, expiration date, authorization number, and cvv code). NOTE: the draft capture report must be run and posted before the credit card funds will be deposited in your bank account.
Amount Received - Enter the amount received. Then, proceed to the cash receipts browser at the bottom of the screen. Click in the “Pay” box if you want to apply the cash receipt to the invoice. You can even change the amount being applied. Select all amounts covered with this cash payment by highlighting them. (Non-highlighted items will not be included in this cash receipt.)
Amount Applied – A non-editable field showing the amount that was applied to this invoice.
Remainder – A non-editable field showing any remaining amount left on the invoice.
Date/Time Paid – The current date and time is automatically entered in these fields but you can over-ride them.
Loc. Received – The location that received the cash receipt. You may use the drop-down menu to select a different location if you do now wish to use the default value from Terminal Settings.
Memo – Notes to go along with this payment may be entered here.
Regarding Credit Card Cash Receipts: Please note that there is no “auth” button in Cash Receipts by design. The authorization is obtained after all of the CC data is entered and an invoice to apply it to has been selected and you “update”. This will then automatically obtain the auth and then update the appropriate invoice(s). If the auth fails, you are presented a message alerting you. This was done to prevent users from obtaining a paid auth and then cancelling.
